If you like my work, buy me a coffee:

2019/10/11

[THEORY] The 4 Point System for Drop-legs

I get asked about my design choices a great deal and recently I have been asked about my system for drop-legs. I have advocated a 4 point system for them since my time with BSUK and it's based on the field testing we did there and the years of experience since. I don't think, however, in all that time I've ever fully elucidated my design choices at any sort of length so I thought it'd make a good post for the new blog.


Key Considerations:
The primary considerations that differentiate Nerf stuff from 

  • Nerf stuff is much lighter than real steel but also much larger
  • Cost/benefit ratios - gear is already bespoke and built by hand in the UK, keeping costs down is important to make equipment affordable to players
Belt Loops:
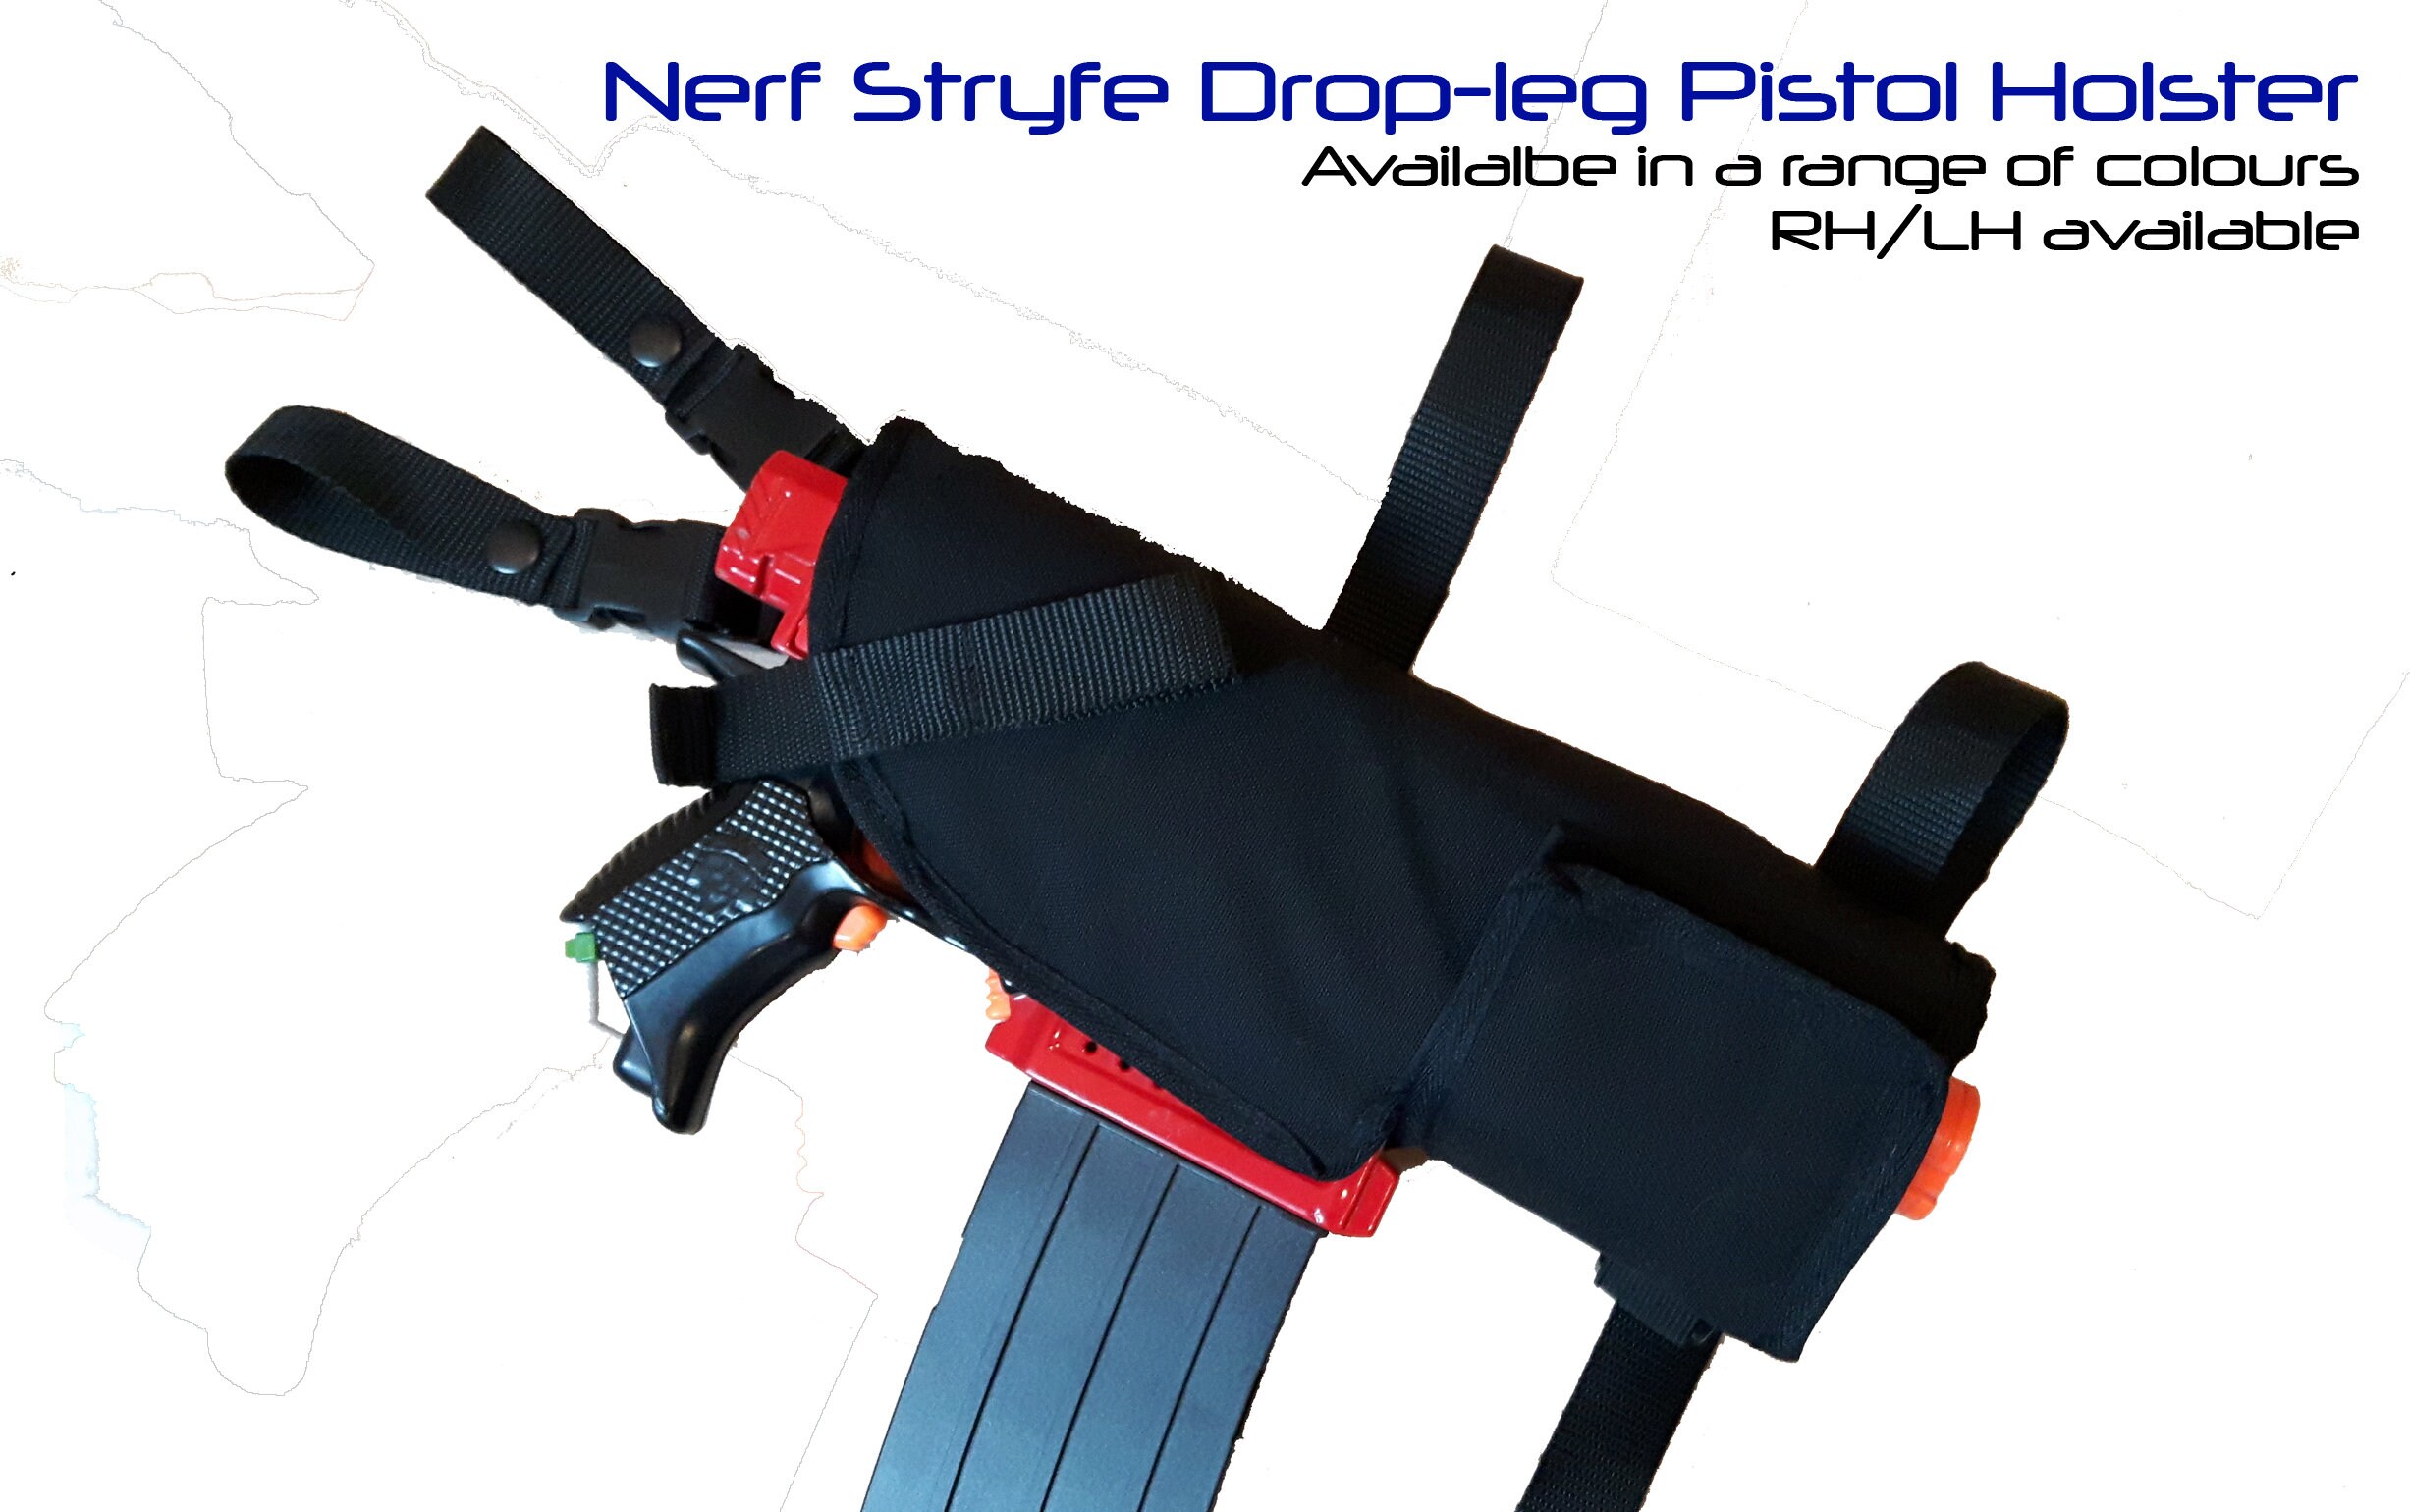
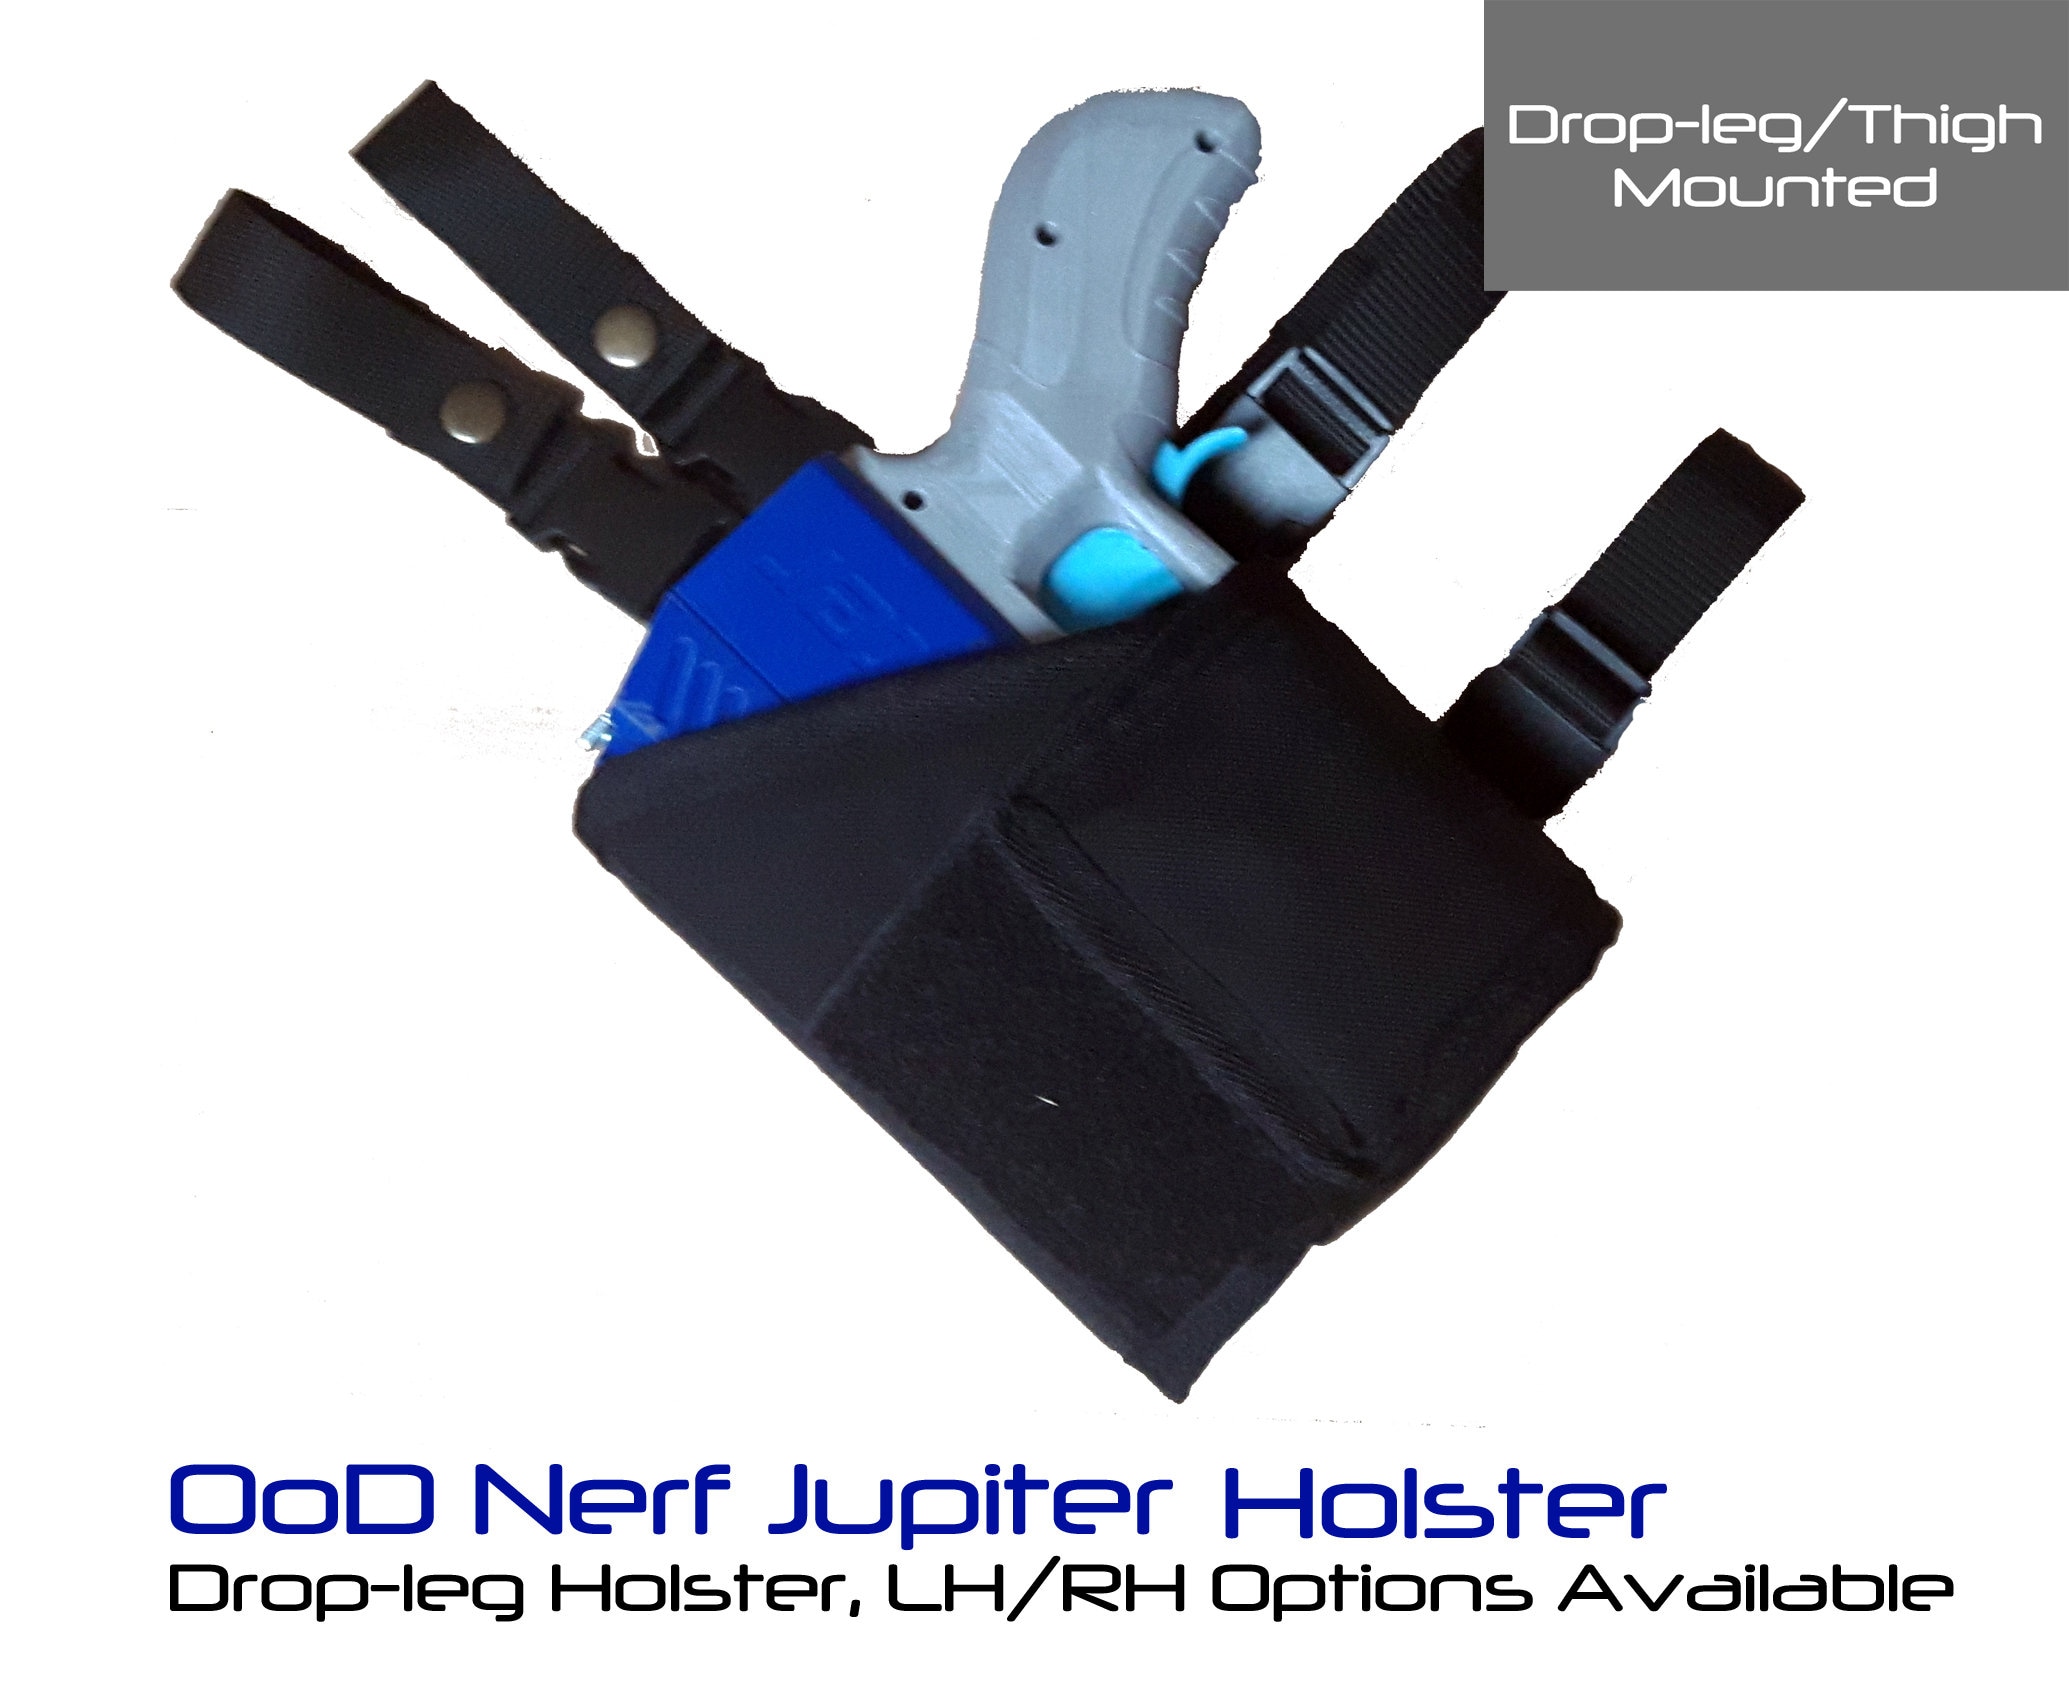
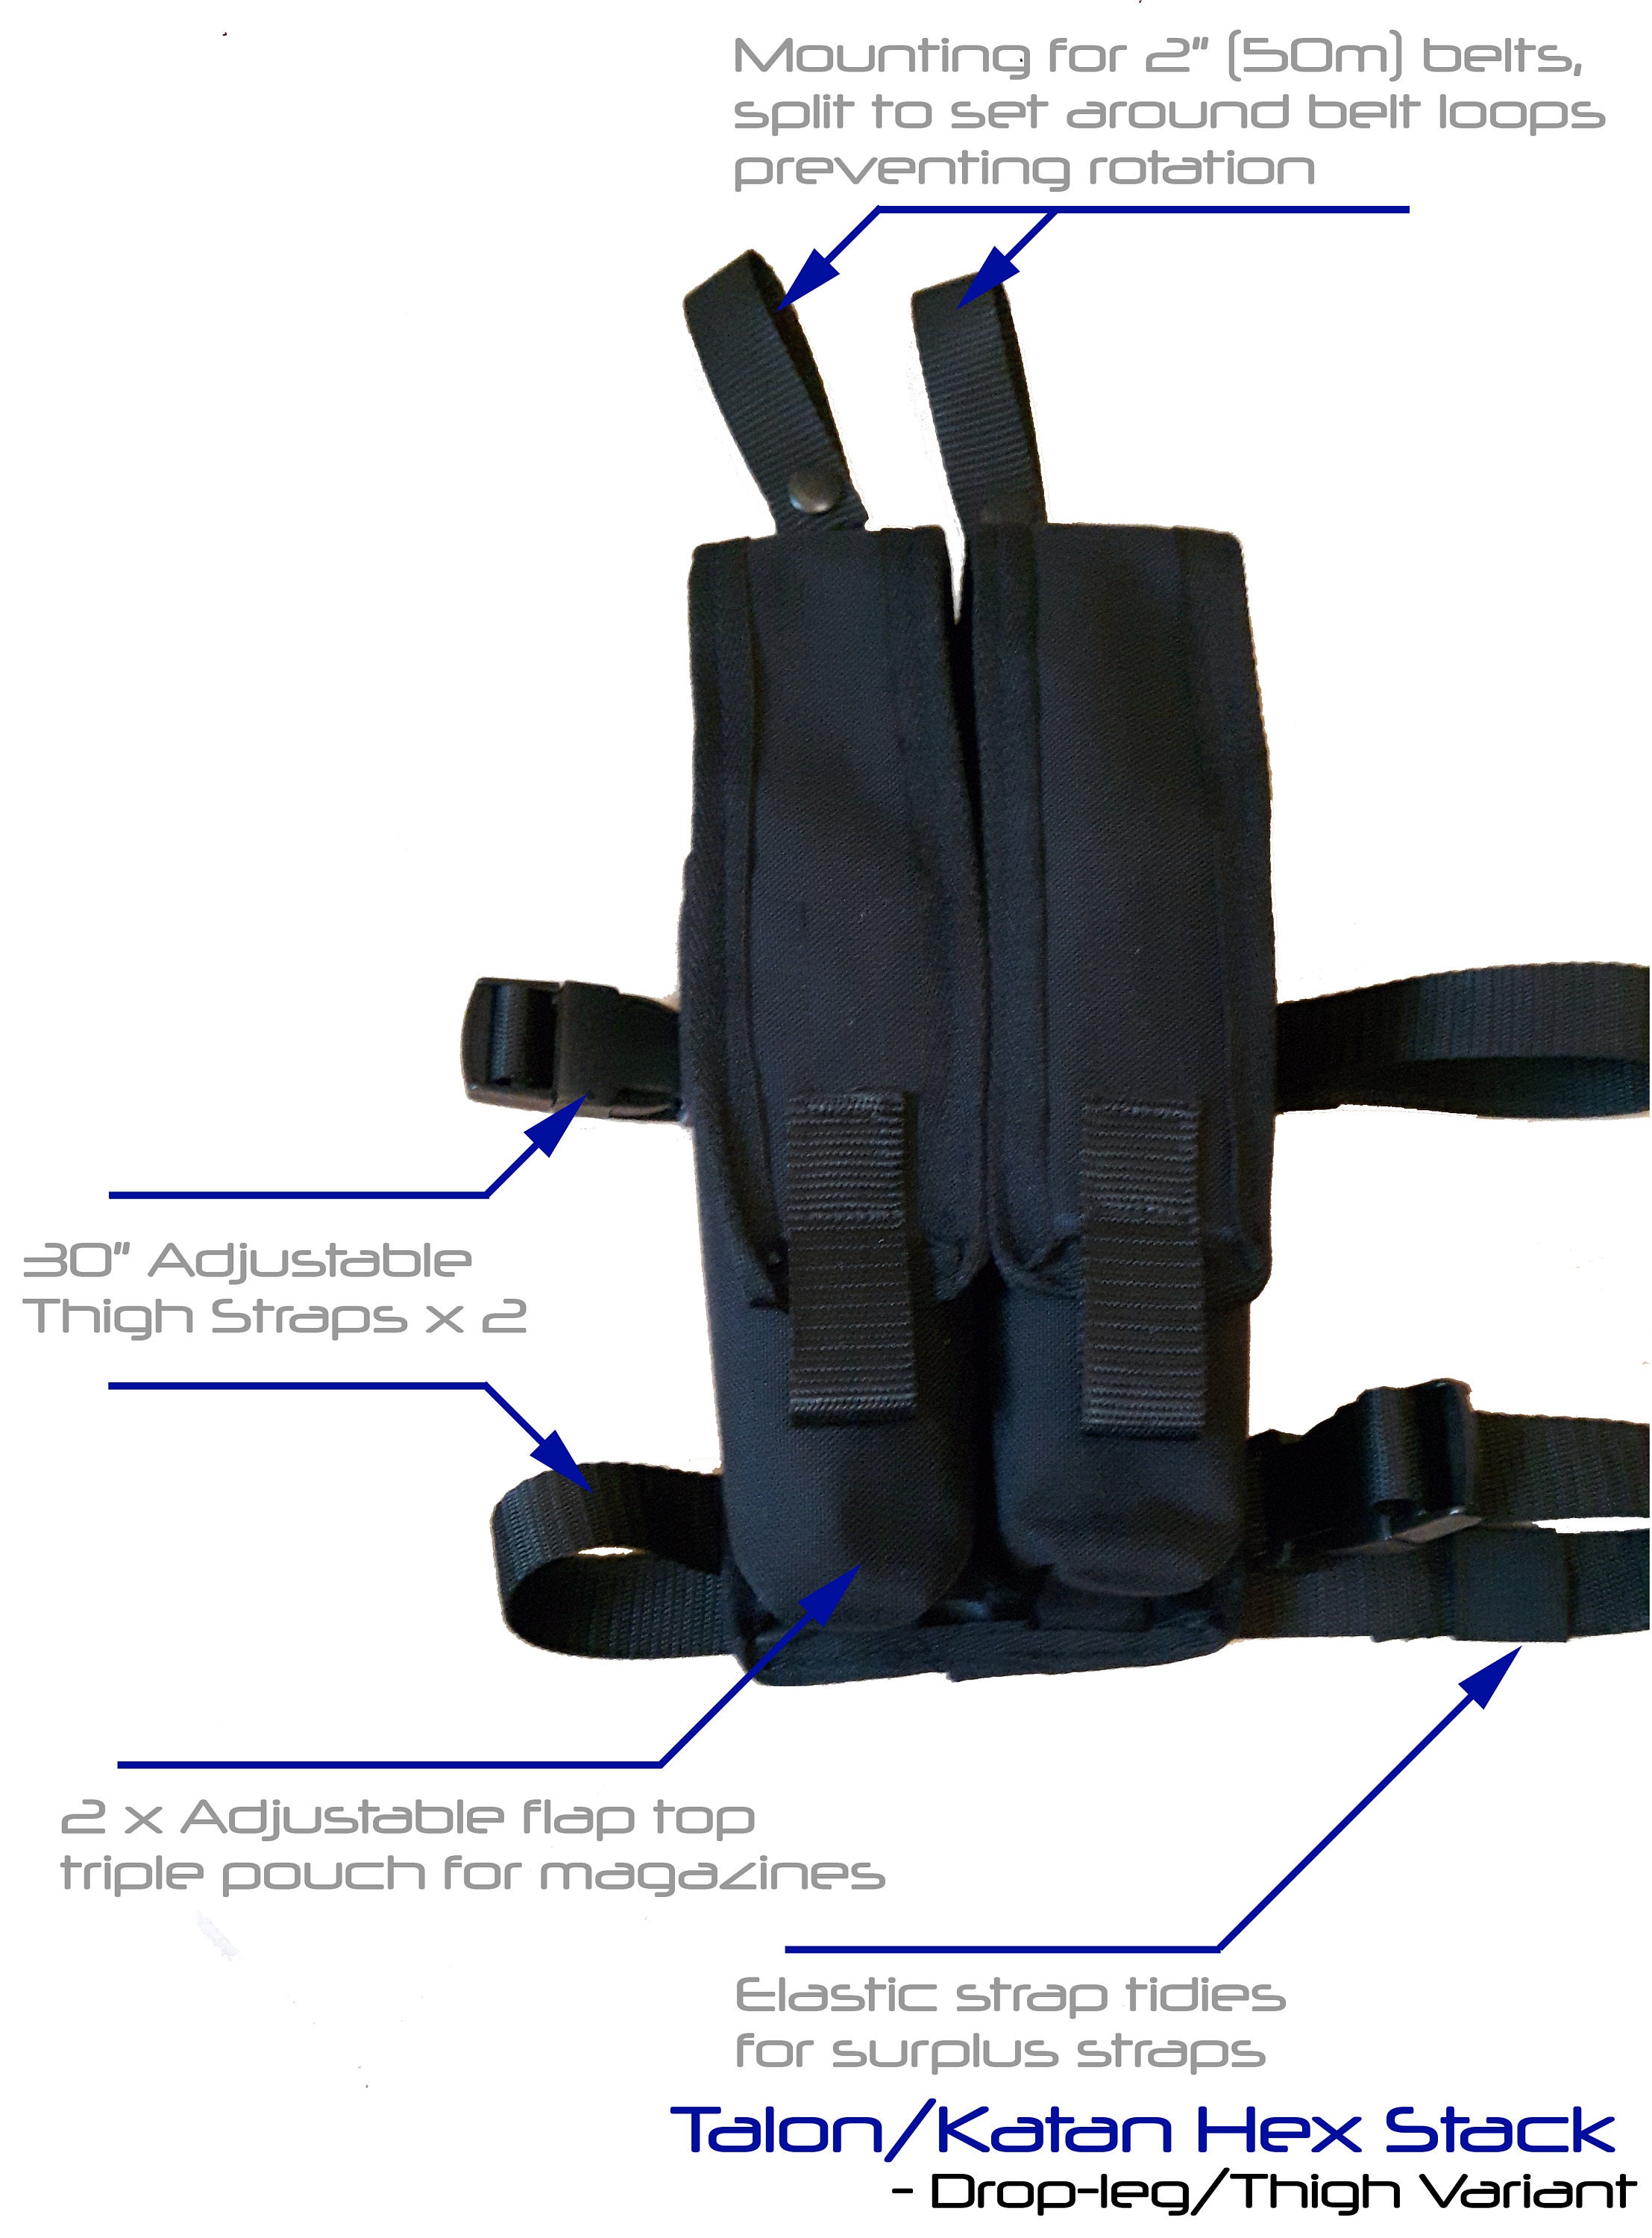
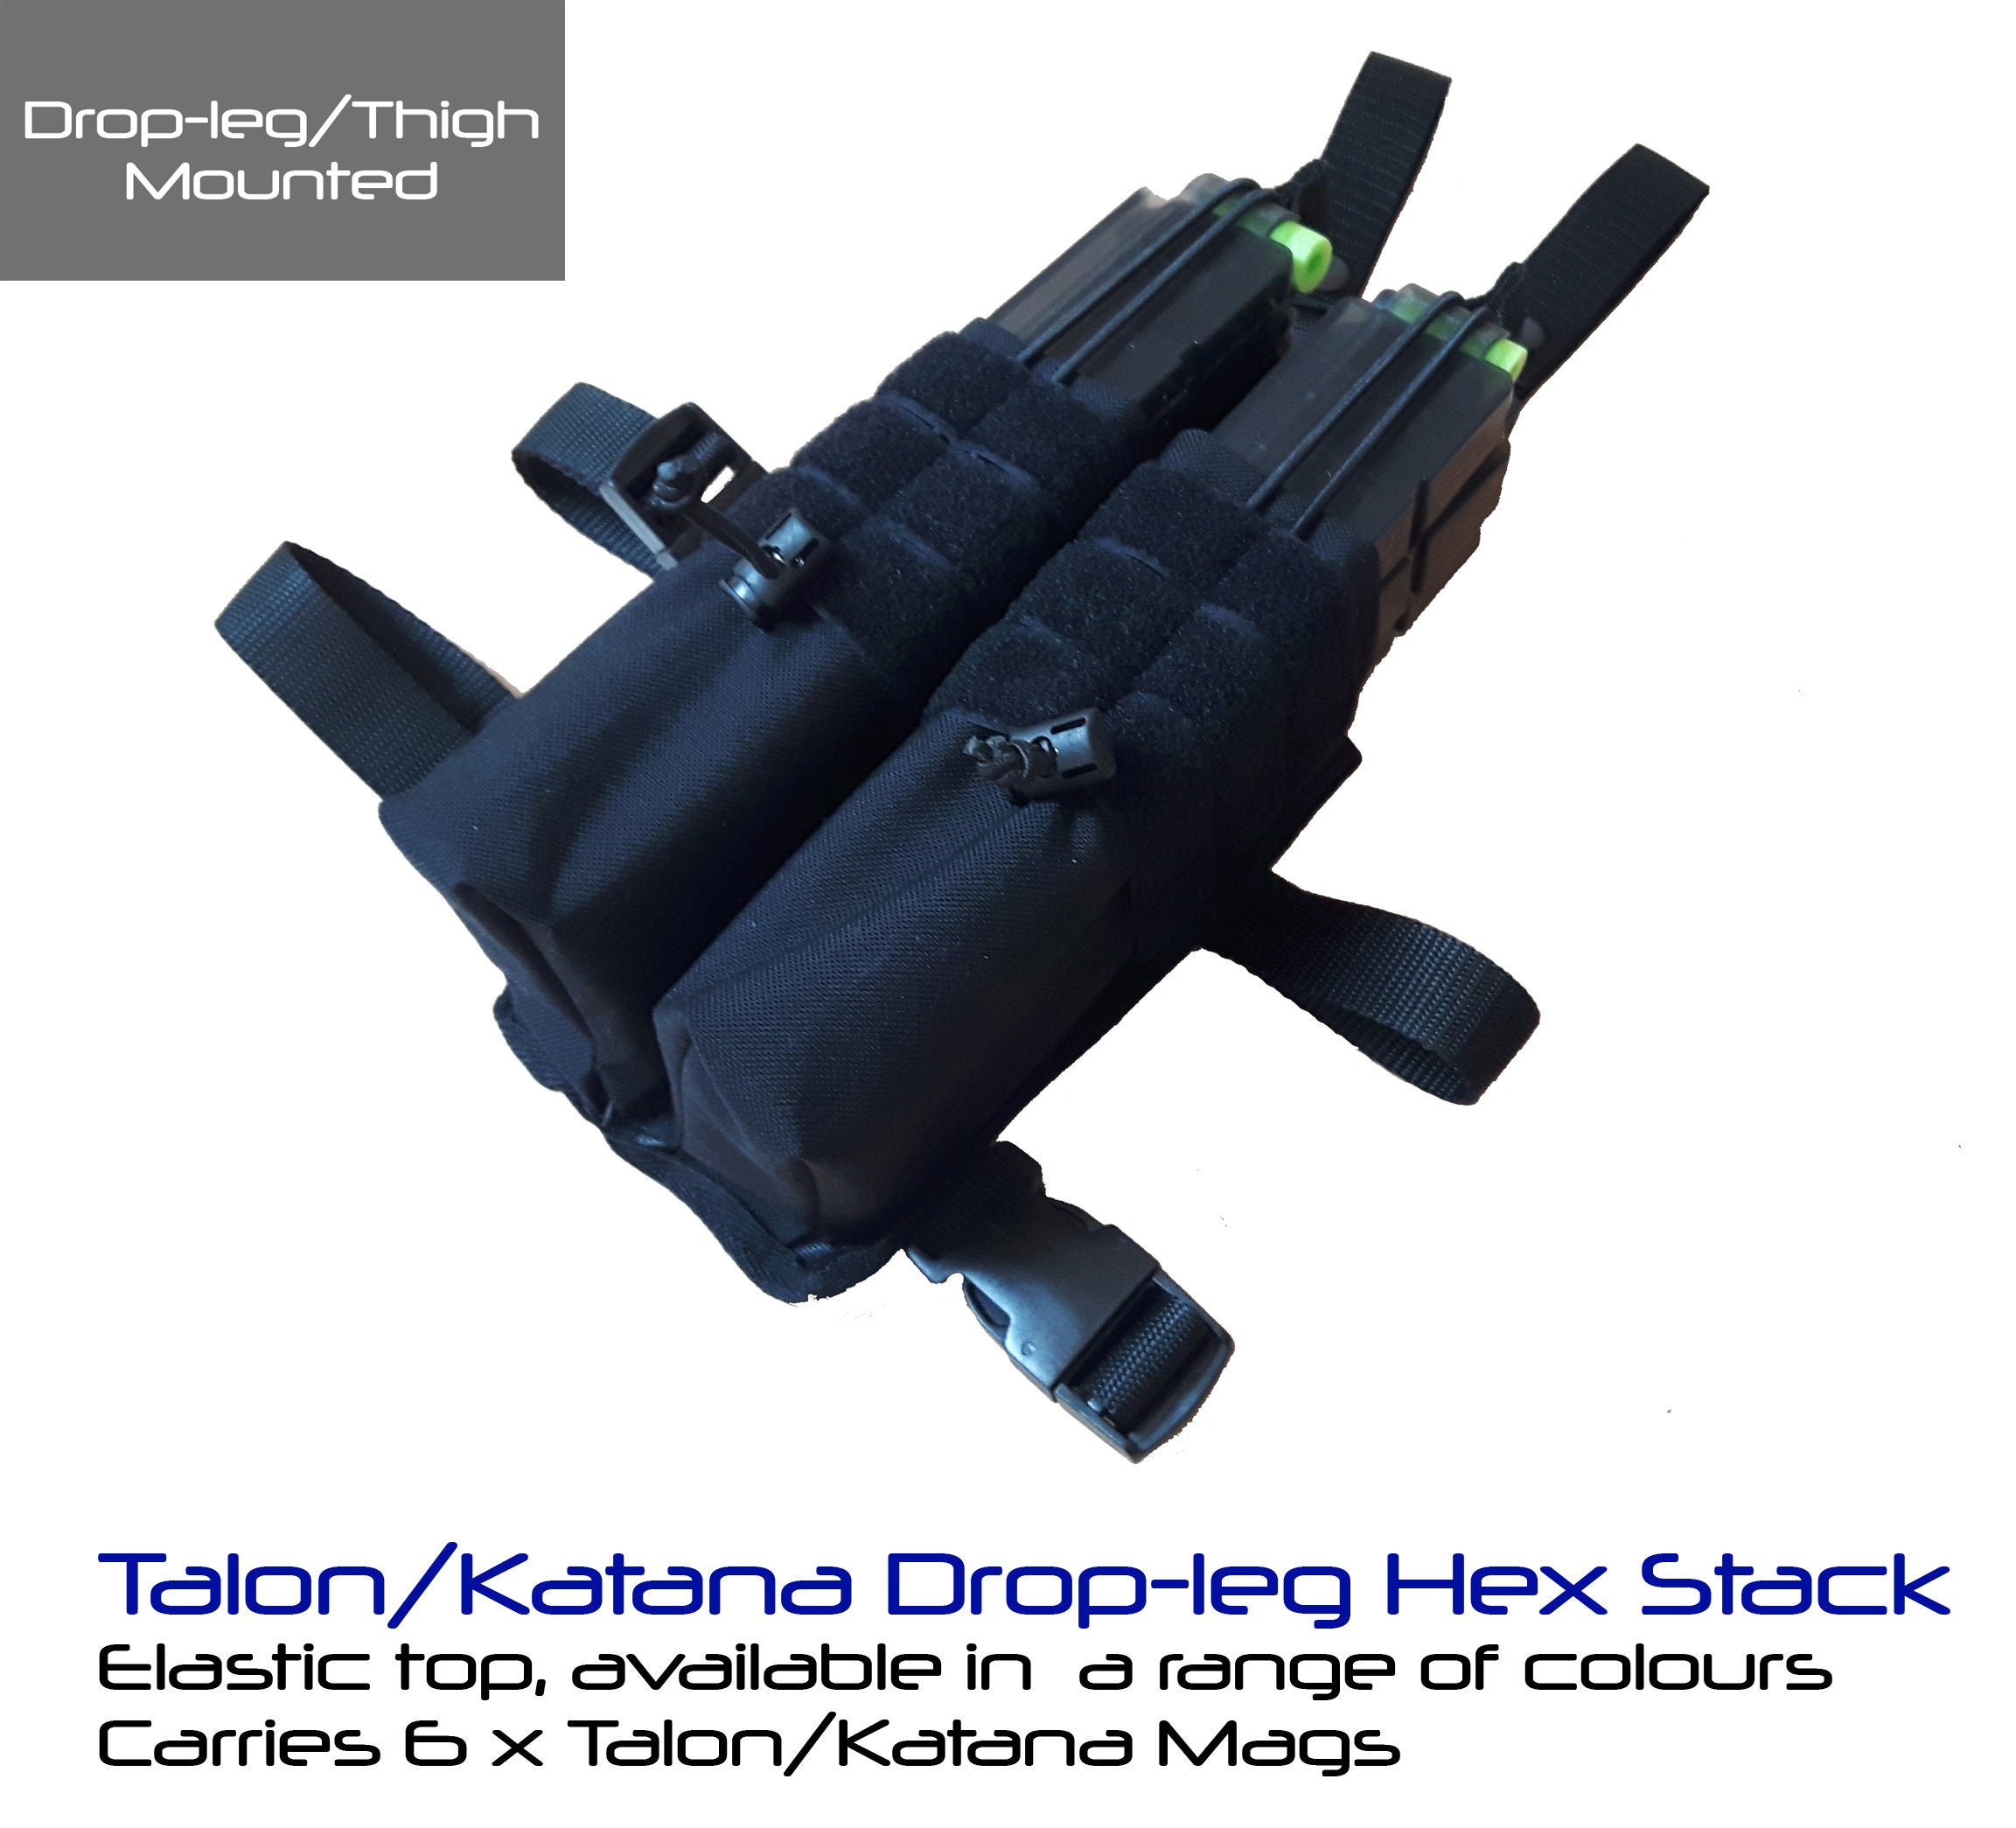
Perhaps the most striking thing about the 4 point system is the split belt loops. The vertical loops at the top are two 25mm straps, each independently adjustableto their own length. This actually costs more than a single 50mm buckle equivalent but it's an important choice. One of the things we found with airsoft gear and even Nerf loads during testing was the tendency for equipment to 'walk' forwards on the thigh. It would start at the 9 o'clock position and then steadily rotate around the leg over the course of testing towards the 12 o'clock position. In an effort to solve this, we elected to split the strap into two so that one line could be placed on either side of a belt loop to lock the holster in place and prevent it from rotating.
There are other, unexpected advantages, to this design. For example, MOLLE vest wears can loop the straps between their webbing so as to offer a greater degree of vertical freedom or simply anchor their vests to their shoulders. I did this a great deal with my gear at Green Cloaks and found it very comfortable once I got the tension right.

The other advantage is that it permits you to spread the load across the width of belt so in the case of heavier blasters, there's less pull on one side. You can even spread the load asymmetrically if you so choose because each of the 25mm buckles can be set to their own length.

With my transition to BoffTac, I made some changes to the traditional MkIV holster based 4 point system. The most prominent in these is the belt loops. BoffTac belt loops are fixed webbing and press stud as standard. The vertical straps on the lower half of the side release buckle are much longer to compensate for the loss of flexibility that comes from binning the Velcro. The reason for this is that as blasters have gotten heavier (Stryfes with metal cages, bigger batteries etc) I spent more and more time putting press studs straight into the belt loops to lock them into place. In the end, I simply elected to save time by just fixing the belt loops and offering studs as standard.

Thigh straps:
The thigh straps are another point of departure from a lot of airsoft and milspec gear that opts for 50mm straps. 50mm straps ought to be as comfortable as their 25mm cousins. A properly set holster that uses the two point belt loops that come as part of the 4 point system ought not to have a problem with narrower straps digging into the flesh of the thigh so narrower straps shouldn't be an issue. If your holster is set right, you ought to be able to get two fingers between the straps and your leg. If not, loosen them and secure the belt loops properly.


In testing, we found that having two straps, one at the top and one at the bottom of the holster or magazine pouch was better for helping keep the panel shaped properly. With Nerf magazines being much larger than their real steel counterparts, it's important to recognise that the various forces are multipled so points of contact need to be more. Equally, you have to accomdate for larger panel sizes which are also better served by having two leg straps instead of one.

The decision to elect for a 25mm strap rather than a 50mm is partly down to cost and partly down to supply chain elegance. In seeking to minimise the number of parts used in each device combined with the fact that there's no comfort difference (that we've found in 6 and a half years of testing) between 25mm and 50mm, it makes sense to opt for the option that keep the price down where possible. Fewer input materials result in a more flexible supply chain, too which has a further impact in reducing costs.

Final words:
I've been doing tactical gear design in Nerf professionally since 2013 and as an amateur since 2011. It's nice to have blog back to explore why I do what I do. In answering client questions directly, it forces me to reflect on why and to recognise that there are other ways to do the thing even if I elect to do them differently. If folks have other questions for me then I'd be happy to answer them for you.

And of course, just because I make design choices like these in my line items, doesn't mean I can't accomadate custom orders or requests.
2019/10/05

Single Shingles - Rambling on Pouch Profiles and Depth Doctrine


Right, I'm getting back into this blogging lark because it's something I've historically been reasonably good at. I need a scribbling pad to elucidate the weird thoughts that come from producing tactical gear for Nerf, a very niche area of a niche hobby. Above are two single shingle pouches - that poses two questions: why are they shingles? And why are they singles? Each pouch contains one magazine in a deviation from my usual three deep doctrine.

The simple answer to the first question is that they look like roofing shingles when laid down flat. The back panel of the pouch is a flat piece with a profiled piece sewn to it. When you account for the 10mm lip that's created by adding the edging tape all the way around, they look like shingles when laid down. That lip serves two purposes. The first being to provide a very stiff border to the pouch and the second being to let it overlap with neighbouring pouches by sitting above or below the neighbouring border. Whe placed on a vest like that, you get something that is akin to a roofing shingle system.

Why singles when you have the 'Three Deep Doctrine'?

The more pressing question is: why singles? I make plenty of triple shingle pouches that are available via the website. I have even been known to make double depth shingles that carry two magazines per pocket. So where did the three deep doctrine come from? Well, when I developed the MkII Miranda back during my time with BSUK, three deep was the narrowest pouch you could sew in a single pass without needing to split the edging tape run. You could do the entire 2.5m edging run without stopping whereas with a double you'd have to do first 150mm on each side, take it off the machine to do the long run over the pouch flap so you'd have three steps instead of one. It's a faff so making three deep pouches became the norm. When I struck out on my own with BoffTac, I took that design philosophy with me and only produced triple depth pouches.

Now, three deep pouches are fine for forward magazine pouches. They give you lots of carriage in an easy access position. Indeed, I normally run my four primary magazine pouches front and centre for fast and reliable access that I can see. That gives me 12 magazine pouches up front when running full lengths or 24 when running Talons. The problems begin when you lie prone. You can lose access to pouches or if you can get to them they are prone to spill. Now, I don't normally fight prone even with Talons at Foam Flinging Skirmish but it is a possibility for a new, theoretical, LARP character I have.

A quick detour via Battle Belts

That is a battle belt. It's development was prompted by my partner who needed something slightly more stable for her engineer character that doesn't wear a vest. She wears a belt and stuffs everything on there. The only problem is that things can slide around when on a belt so cloning the Condor battle belt in DPM seemed like a good idea. At the same time as cloning it, I realised that my own future plans for a character could benefit from this form factor, too.

What does the battle belt have to do with singles? Well, while my new character will be a (space elf) frontline fighter, I don't want to have to live in a vest all of the time. Essentially, having a lightweight battle belt with a skirmish order of kit on it to sit below the vest itself is ideal. I can't have magazine pouches at the front because they will intefere with the pouches on the vest when its worn. That means any pouches need to sit at the 3 or 9 o'clock positions. The problem there is that I can't have too much depth because adding width to my hips not only slows me down but also makes me bulkier which is the opposite idea of a skirmish order.

Theoretical belt plan for a skirmish load. Mirror for a right handed person.


Enter the single magazine pouch. My character will be running a fully automatic blaster in an environment when the typical monster has 6-10 global hits. With 2 x 17 round magazines (1 in the pouch, one in the blaster) I've got 2 or 3 monster's worth of pew before I'm dry. Add a dump pouch to allow for top off and you've got a low intensity, high mobility fighting rig. If you're trying to deal with more than 2 or 3 monsters without the cool off time to replenish then you've misjudged the engagement intensity and deserve to be sad. Adding a second one at the 9 o'clock position offers the choice of adding extra extension between reloads because you can swap the 9 o'clock into the 3 o'clock pouch for a little extra endurance.

With the blaster and 2 or 3 mags backed up by a melee option, I should be able to skirmish my way through most engagements without too much difficulty. Only when I have to go on extended patrol will I need the full engagement rig with all the guts and glory that go with it. The added bonus of this extra magazine pouch is that I will be able to source some ammunition even when prone in the full rig.

I guess all this proves that there's a niche for pretty much everything and that by making my own gear, I can meet those needs. I want to get back to blogging and making videos properly since I think there's a gap in the community for someone to look at gear in depth like this. I think the blog will become the place for the in-depth ramblings of my inner tactical and gear goblin while I hope the YT channel can be something more like video essays and explanations of tactical information. There are concepts that will work better in text format (like this article) while stuff like field leadership and tactical work will fare better as a video.